We’re cautious about espresso machines that look like an upgrade, but aren’t. And the Barista Touch is exactly that kind of machine – it sits next to the Oracle Jet on Breville’s website and shares a similar touchscreen aesthetic. So, at $1000, it’s easy to assume it’s a more affordable version of the same thing. It isn’t. If you understand what it actually is (which we’re breaking down in this hands-on Breville Barista Touch review), it’s a genuinely excellent machine. But if you buy it expecting something it isn’t, you’ll be frustrated.

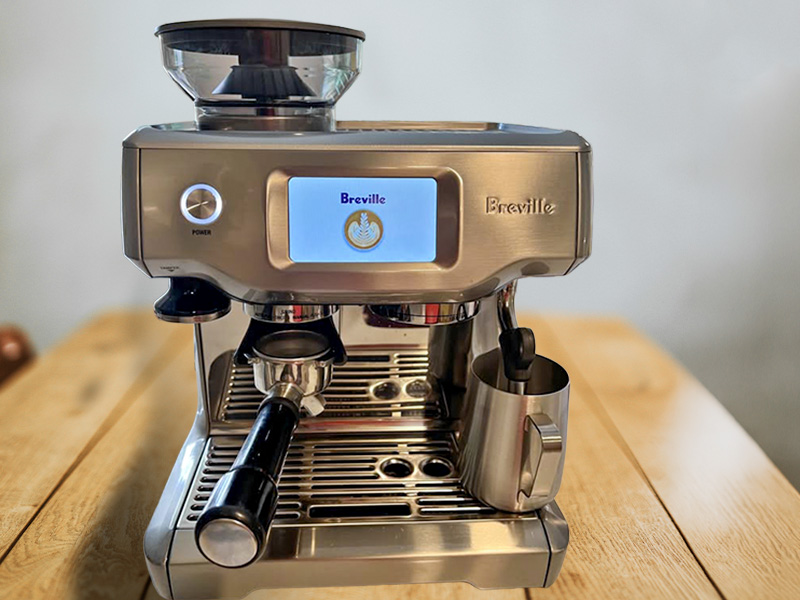
The Barista Touch is a “tweener” machine with integrated grinder, touchscreen, and automatic milk steaming in one package. Once your beans are dialled in, using it every morning is genuinely effortless. The caveat is that the espresso workflow is identical to the Barista Pro, which costs around $150 less. The touchscreen and the auto milk are doing the extra work to justify the price difference.
We spent weeks testing espresso shots, milk textures, settings, coffee bean types, and sleep-deprived workflows. We’ve tried to figure out if this machine is the right fit for anyone or if it somehow ends up in “no man’s land” of espresso making. Let’s get into it:
This article may contain affiliate/ compensated links. As an Amazon Associate, we earn from qualifying purchases at no additional cost to you. For more information please see our disclaimer here.
At a Glance: Breville Barista Touch Review
Verdict: The Barista Touch earns its price through two things – the touchscreen and the milk frother. The touchscreen means every setting, drink, and cleaning cycle is just a few taps away. And, for the milk-coffee drinkers, the MilQ system automatically (and consistently) takes care of things without your input.
We found the espresso quality consistently excellent (once we’d found the right grind). It was balanced and rich, with real fruity, chocolately depth.
What you don’t get is any help pulling the espresso. Dosing and tamping are down to you, and shots are timed, so you’ll want scales when dialling in new beans. It’s not difficult, but the Barista Pro is cheaper and asks the same of you.
Bottom line: This is a smart, well-built machine with a genuinely premium feel. Just know that the espresso workflow requires the same involvement as any other semi-automatic. It’s whether you think a touchscreen and automatic milk are worth spending extra for.

Pros
- Responsive, easy touchscreen
- Exellent automatic milk system (MilQ)
- High quality espresso (once dialled in)
- 30 grind settings offer real precision when dialling in
- Create and save 8 custom drinks
- ThermoJet heater is ready in 3 seconds

Cons
- You’ll need coffee scales to dial in
- Manual dosing and tamping
- Auto milk doesn’t match a skilled manual wand
Who It’s For (And Who It’s Not!)
✅ Buy the Breville Barista Touch if:
- You want café-quality espresso drinks at home without having to learn to steam milk manually. Having the MilQ system to handle temperature and texture automatically is the main reason to choose the Barista Touch over the cheaper Barista Pro.
- You use your coffee machine every day and want the experience to feel good, not just functional. The touchscreen makes using the Barista Pro a great experience. And saving custom drink settings means your routine gets faster over time.
- You’re comfortable with the manual espresso side of things – dosing into a portafilter, tamping, and keeping an eye on your shot output. If that sounds fine, the Barista Touch delivers the rest with very little friction.
- Counter space isn’t tight. At 12.4″ wide and 12.8″ deep, it needs its own dedicated spot.
❌ Skip it if:
- You want automation on the espresso side, too. The next model up, the Barista Touch Impress, adds the Impress Puck System for assisted dosing and tamping… and costs $500 more. For some people, that’s worth it.
- You’re an experienced home barista who already steams milk manually. The Barista Pro can pull the same espresso quality for around $150 less.
- You’re expecting the Oracle Jet experience at a lower price. The Oracle Jet (and previous gen, Oracle Touch) automates dosing and tamping. The Barista Touch does not.
Key Features
1. Automatic MilQ Milk Steaming
This is the reason to choose the Barista Touch over the Barista Pro, full stop… If you’re a milk-based espresso drinker anyway.
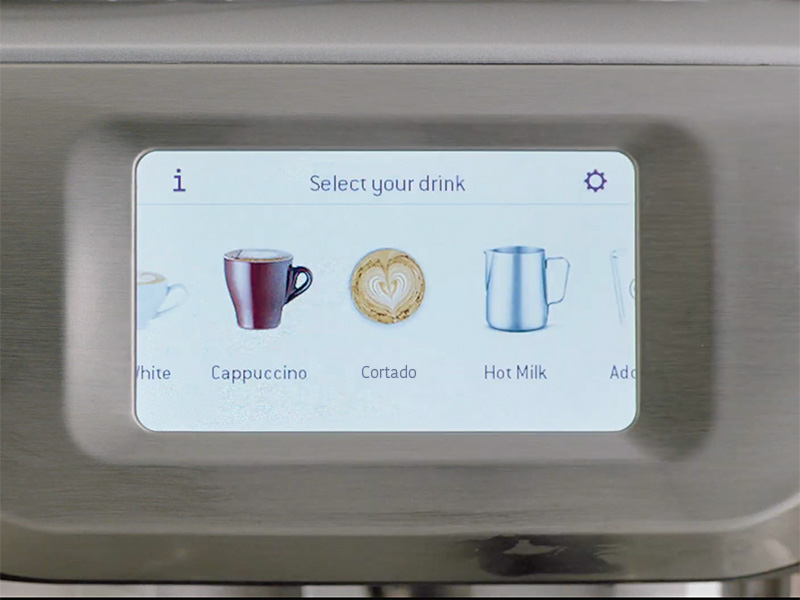
Select your drink on the touchscreen, place your milk jug on the sensor, and the machine automatically steams to your chosen temperature and texture level.
There are eight texture levels from silky flat-white milk to dry cappuccino foam, and eight temperature settings between 104 and 167°F (40 to 75°C). Once you’ve found your preferences, you can save them to a custom drink, and they’re set for next time. Or, if you want to feel like a barista, you can switch it to manual mode.

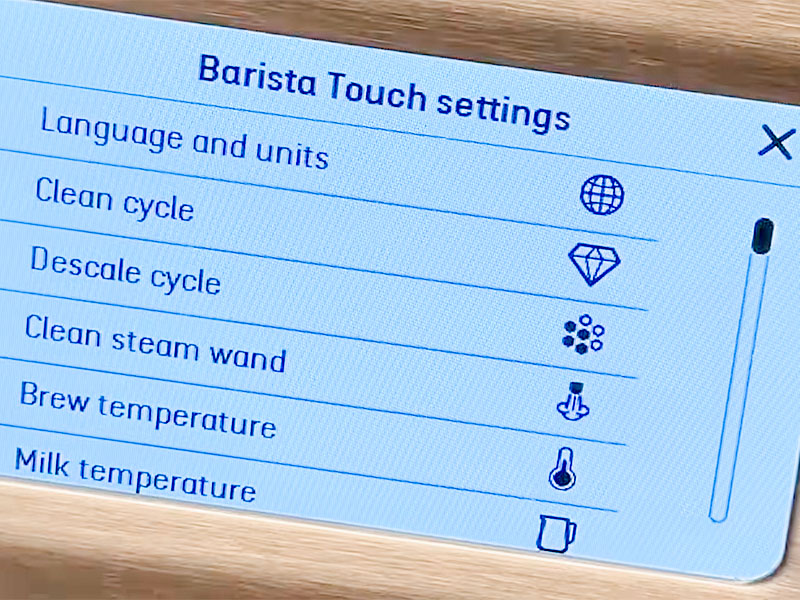
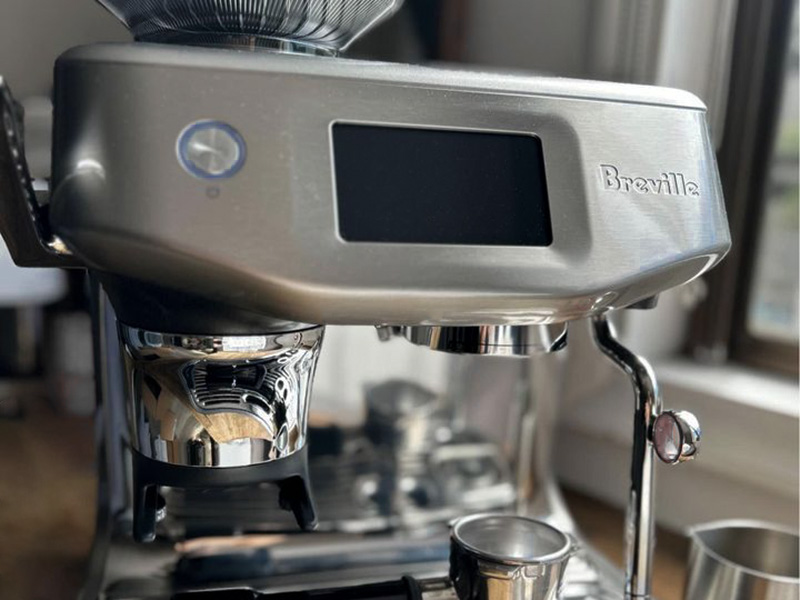
2. Touchscreen Interface
The 3.5-inch full-colour touchscreen doesn’t just look good, it changes how you interact with the machine day-to-day. Adjusting your grind, changing brew temperature, navigating the cleaning cycle, or tweaking your shot time – it’s all a few easy taps rather than hunting through button combinations.
Compared to newer models, the screen isn’t the most vibrant. But it’s functional and easy to use, so we can’t complain too much.
3. 30-Setting Integrated Grinder
Thirty grind settings is a meaningful range for an integrated grinder. It’s a significant step-up from the 16 on the original Barista Express. The Baratza conical burrs have a strong reputation for excellent espresso grind quality. Zero complaints from us.
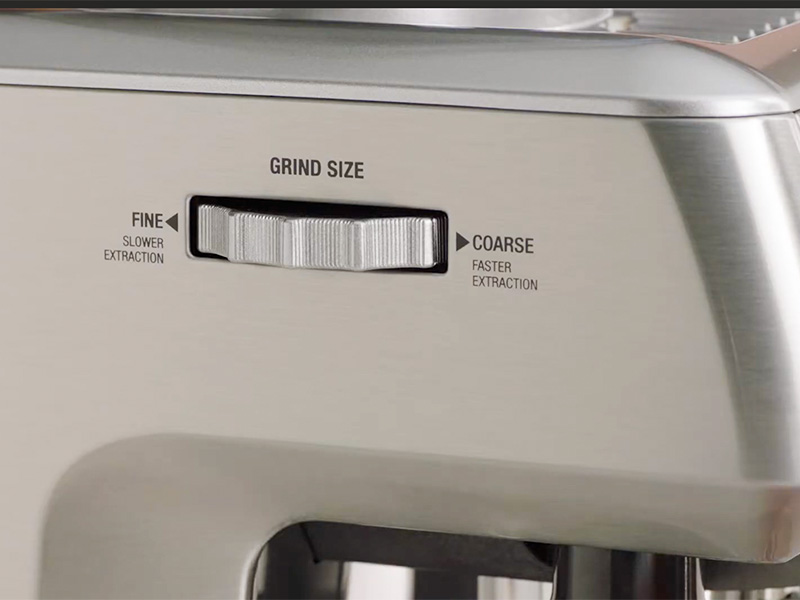
It’s simple to adjust using the side-mounted grind adjustment dial (pictured below), and the screen shows the setting you’re at so you can keep track.
4. Thermojet Heating System
Three seconds from pressing the button to the machine being ready to pull a shot. That’s not a marketing claim to be sceptical of: it really is that fast, and it makes a genuine difference to your morning routine (especially if you prioritize that extra 5 minutes in bed – guilty!)
The caveat is that the 3-second heat-up is only for the boiler.
For the best results, a quick turbo flush (pulling a shot with no coffee and the pressurized double shot basket) before your first shot of the day will bring the group head up to full brew temperature and warm your cup at the same time.
5. PID Temperature Controls
PID is basically a fancy bit of tech that allows you to control the brew temperature of your coffee to an incredibly accurate degree. Given the price, this is a great feature to have and not one found on even some of the high-end espresso machines.
6. Custom Drink Presets
The small number of default drinks (5) doesn’t matter so much since you can customize and save 8 drinks exactly how you like them. If you’re a lover of a niche coffee drink – we love a genuine Spanish-style cortado, for example – this is a great feature.
How easy to use is the Breville Barista Touch?
Compared to most other semi-automatic espresso machines, the Barista Touch is very easy to use. Once you’re past the initial setup phase, it’s genuinely pleasant (and quick) to use too.
Getting started is straightforward:
Fill the water tank, install the water filter, add beans to the hopper, and follow the touchscreen prompts for the initial flush. The screen walks you through everything clearly (even if it’s your first espresso machine), and there’s nothing technically demanding about the process. We were sipping our first cup of coffee within 20-30 minutes of unboxing.
The day-to-day workflow has a few more steps:
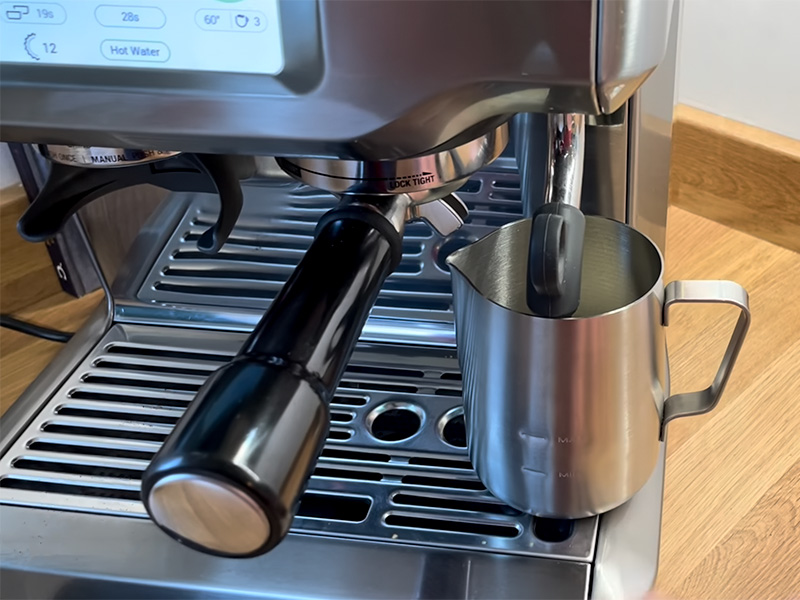
- Place your milk jug on the sensor so the MilQ system can steam it automatically
- Select your drink from the touchscreen
- Lock the portafilter into the dosing cradle and press to grind
- Check the dose and trim with the razor tool, if needed
- Tamp firmly and evenly
- Lock the portafilter into the group head
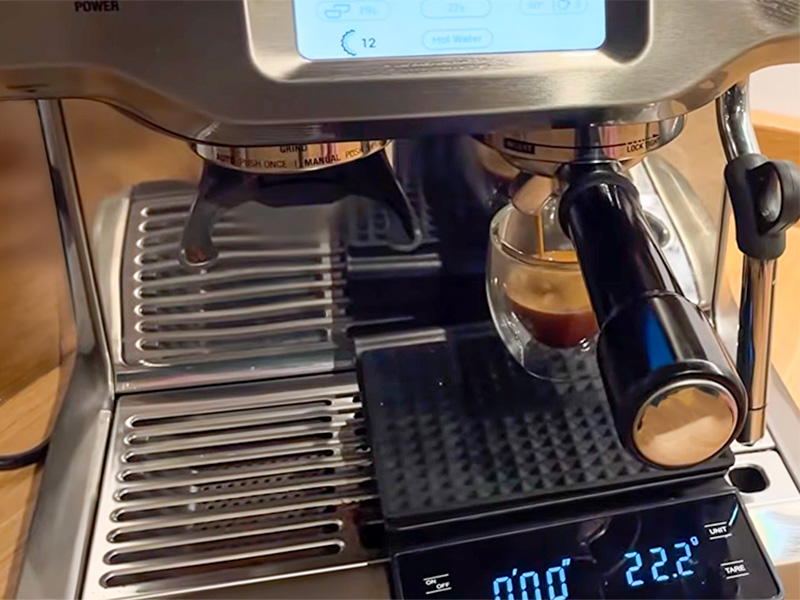
The shot control is timed rather than volumetric, which is the one thing worth knowing before you start dialling in. For the best-tasting results, we recommend using a coffee scale too – we use this one.
The default is 30 seconds for a double. If your grind is too coarse, the shot will run through too quickly, and you’ll have a weak, watery espresso in 30 seconds. Go too fine, and it’ll be small and over-extracted.
Every time you get a new bag of beans, you’ll want to bust out the scales for the first few sessions. Stop the shot manually a couple of grams before your target weight, check the taste, then dial in the time to match. Once that’s done, the machine handles the rest – you don’t need to watch it.
One specific annoyance we had: the milk jug has to be fairly close to the portafilter to sit correctly on the temperature sensor. It feels slightly cramped and can catch you out when you’re tired.
Unlike the Barista Touch Impress, you also can’t queue the milk to start automatically after the shot finishes, so you have to switch between modes manually.

How good is the coffee from the Breville Barista Touch?
The Barista Touch pulls excellent espresso, once you’ve found your settings.
It took us some time to find the settings we were really happy with – maybe 10 shots. But, after that, we were consistently pulling balanced, deep, and richly flavored espresso with real fruity, chocolatey character. There was good crema and proper body – good enough to feel like you were at the hands of a pro barista, not you standing in the kitchen in your PJs.
The consistency was genuinely impressive for an integrated grinder machine. Shot-to-shot variation was minimal once the grind was locked in, and the machine didn’t require constant tinkering across a bag of beans. That said, when you switch to a new bag, expect to spend time re-adjusting to the best settings. The timed shot system means the brew ratio can shift if your new beans grind differently, with all other settings being the same.
The 30 grind settings and Baratza conical burrs give you enough range to find a clean result without pushing to the extremes of the dial, which is a good sign. If you’re somewhere between settings 10 and 25 with most blends, the machine has room to adapt when you change beans.
Once you’ve dialed in your perfect shot and milk, you can save it to one of the customizable drink profiles on the Barista Touch. That way you don’t have to think about it in the future; you can just select your favorite from the touchscreen.
Having access to so many customizable settings means it’s possible to get your coffee just right, no matter what that looks like for you. And it’s relatively simple to get there. However, if you’re already a skilled barista or want total control over every parameter, you’ll probably feel a bit stifled. For everyone else, it’s great to use.

Our Breville Barista Touch Settings
After playing around with the settings, we settled on:
Grind setting 17, double shot basket, and default brew temperature. From there, shots ran consistently at 25 seconds and tasted really good.
Those settings were with a medium-dark espresso blend.
We also tested a medium roast single-origin. The Barista Touch handled it okay, but we had to go a few settings finer, and it took an extra couple of shots to find the right extraction. If you regularly drink lighter roasts, be patient with the dial-in: the grinder is capable, but lighter beans can be less forgiving. Medium-dark blends are where this machine is most at home.
What about Milk Frothing?
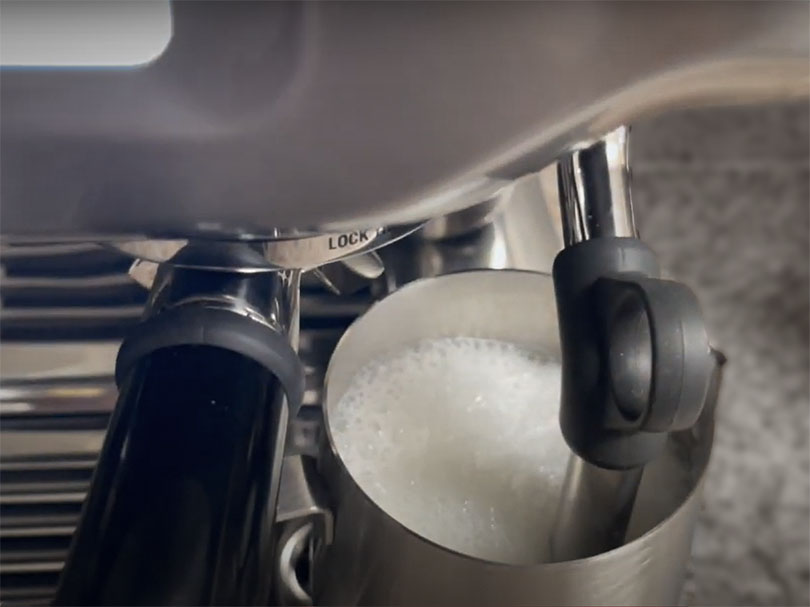
Automated milk is one of the big selling points of this machine. So it needs to be good.
Honestly, the auto-steam MilQ system impressed us. Temperature was consistently within a couple of degrees of target (though rarely bang on). And the texture, while not matching what someone who’s experienced with a manual wand would produce, was smooth, well-incorporated, and more than good enough for a well-made flat white or cappuccino.
For people who’ve never manually steamed milk before, the MilQ system will give results that would take weeks of practice to match with a traditional steam wand.
Having so many foam and temperature settings (8 for each) means you’ll almost certainly be able to get milk really close to what you want using the automatic system. Whether it’s hot, old-school dry cappuccino foam or near-zero foam, just above warm milk for cortados.
By learning to use the wand in manual mode, you can get better results – the quality ceiling on the automatic wand is lower than manual steaming at its best. So if you’re already well-versed in using a manual wand and care about achieving genuinely exceptional microfoam, you’ll notice the difference. For everyone else, the MilQ system is a genuine ‘make my coffee life better’ feature that consistently delivers good results with no skill required.
If you want to try your hand at latte art, you’ll be better off in manual mode. It’s possible in automatic mode, but not great. We found that using cold milk straight from the fridge, steamed to 140°F with a foam level of 2, yielded the best results. Though this will vary depending on the fat content of your milk.
There are 30 settings on the grinder. Compared to other Breville espresso machines, this is a significant upgrade on the Barista Express’ 16 but lagging well behind the top-of-the-range Oracle or Oracle Touch which both have a staggering 45.
Getting the grind just right is fairly simple. Adjustments can be made using the dial on the left-hand side of the machine. We recommend starting at around 10 as a good middle ground for you to feel out what will work best for you and your favorite beans.
The Barista Touch comes with double-walled filter baskets for the portafilters which are ideal for using pre-ground coffee if you need to. Obviously, it would be a waste of the machine’s capabilities to do this often but it’s a nice option to have for the occasional decaf coffee or something like Lifeboost’s flavored coffees.
What type of Beans should you use?
First and foremost, you want to use whole beans, and ideally from a very consistent coffee roaster.
The integrated grinder is a real asset on the Barista Touch, so there’s zero point in using a separate grinder or buying pre-ground coffee. After all, freshly ground coffee will make a bigger difference to your espresso quality than your machine will. And the Bararza burrs in this machine are good quality.
Medium-dark roast blends are the sweet spot for the grinder’s range and for the machine’s extraction profile.
The grinder was OK when it came to lighter roast, high elevation, single-origin beans. But not amazing. It can handle those coffees if that’s what you love, but it isn’t where it excels.
As it’s a manual tamping machine, you could put any ground coffee straight into the portafilter if you really wanted to, like if you wanted a decaf and didn’t want to replace the contents of the bean hopper. Just be aware that your shot times are for the beans in the hopper and not necessarily the same for the pre-ground. You may need to dial them in separately and remember the shot time or save it to one of the custom drink slots.
Desgin and Build Quality Review
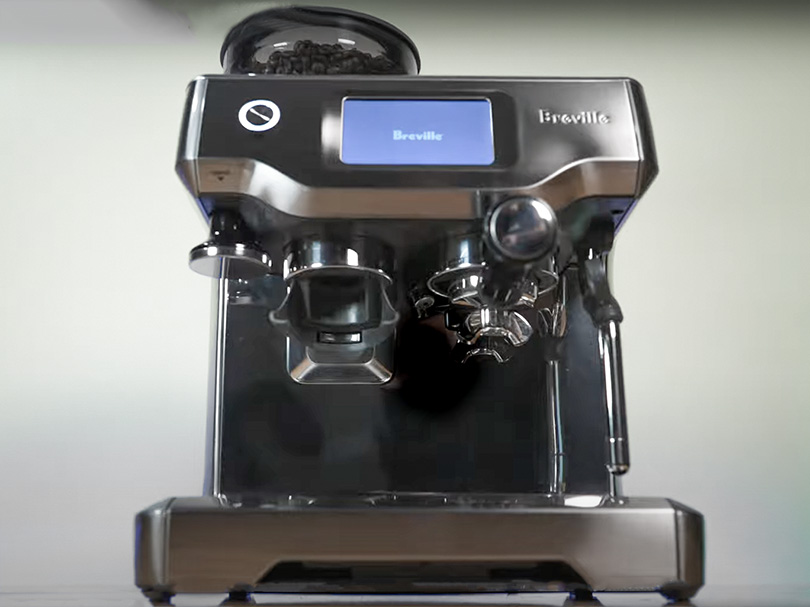
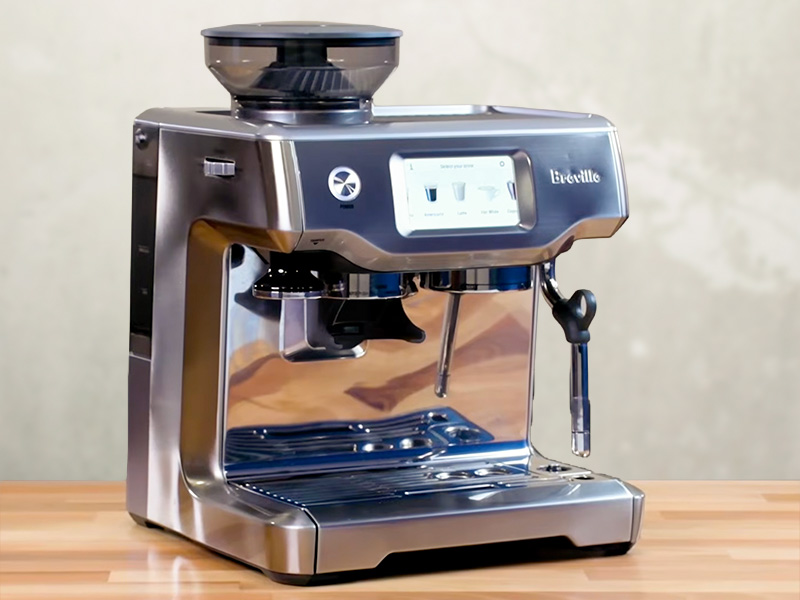
The Looks
From a distance, the Barista Touch does look like a smaller Oracle Touch (we did a head-to-head comparison here). That’s not an accident. Stainless steel finish is classic Breville and the touchscreen and curved edges are very similar.
Up close, it looks like the mid-range machine it is. Don’t get me wrong, it’s still a handsome piece of kit – and it looks significantly nicer than the Barista Pro.
It comes in brushed stainless steel and a couple of other colors, depending on where you’re buying it (usually only direct). We had the standard stainless steel version, which fits easily in most kitchens. And we’re boring, so it’s our favorite.
At 12.4″ wide by 12.8″ deep by 13.4″ tall, it’s more compact than it looks in product photos. Still a dedicated counter machine, but it’s not as oppressively large as some other machines in Barista Touch’s price range.
The Build
Breville’s build quality at this price range is consistently solid. The portafilter locks in firmly, nothing flexes or rattles, and the stainless steel group head and basket feel like parts built to last.
The ThermoJet heater is a meaningful upgrade from the Thermocoil found on the Barista Express range: it heats faster and is more thermally stable shot to shot.
One thing to be aware of is that the Barista Touch uses a 54mm portafilter. If you ever want to upgrade to a third-party bottomless portafilter or explore the wider accessory market, 58mm is the industry standard, so you need to check sizes carefully. Not a dealbreaker, and with more of these machines about, there are increasing numbers of options at the 54mm size.
Breville’s out-of-warranty support is one of the better things about buying in this range. Parts are available, machines can be serviced, and older Breville espresso machines are still running in kitchens years after they should have been replaced. I’d realistically expect this machine to still be going strong after 5 years.
Cleaning and Maintenance Review
The daily cleaning on the Barista Touch is partly automated and mostly quick and easy.
The touchscreen takes a lot of the pain out of cleaning. Backflushing and descaling are both guided through on-screen prompts and take the guesswork out completely.
Daily: Wipe down the steam wand immediately after use (it will also automatically blast out some water when it’s finished). Empty and rinse the drip tray. Quick wipe of the group head.
Weekly: Backflush with the cleaning disc and a cleaning tablet (both supplied in the box). The touchscreen guides you through the cycle automatically and takes around 5-10 minutes.
Periodic: Descale when prompted by the machine, typically every 2-3 months, depending on your water hardness and how often you use the espresso machine. This usually takes us around 30 minutes to complete. Inside the box, there’s some descaling solution to get you started.
Look, I know that cleaning is nobody’s favorite task, but don’t skip it. If you want a great espresso machine, you’ll need to spend time cleaning it. Otherwise, bacteria can grow inside the machine, which is not only gross but will also make your coffee taste worse.
One great thing about Breville machines in general is that the brew head and portafilter design allow you to deep clean your machine with confidence. Other manufacturers (I’m looking at you, Jura) don’t allow you to remove the brew group (or make it very difficult to do so), meaning you can’t be 100% sure they’re clean.
The Competition
How much help do you want from your espresso machine? How important is espresso and milk quality? And do cold coffee drinks matter to you? These are the questions you need to answer to decide if the Barista Touch is the best option for you.
Breville Barista Touch Impress
- ☕️ Espresso Quality: 9.5/10
- 🥛 Milk Quality: 9/10
- 📋 Drinks Options: 6/10
- 💸 Value for Money: 7/10
- 🏆 Overall Rating: 8.5/10
The Barista Touch IMPRESS is the natural next step up from the Barista Touch – and the one to consider if the manual dosing and tamping feels like too much to ask.
With this machine, you get the added Impress Puck System: automatic dosing and tamping that removes the two most common reasons a shot goes wrong. If you’ve tried manual espresso before and found your puck prep was inconsistent or frustrating, the Barista Touch Impress solves that for an extra $500.
The espresso quality is also a step up as a result: the floor is higher because the prep variables are removed. You also get “cold brew” and cold espresso, where the shots are brewed more slowly and cooler. Plus, one of my favorite features – the really intuitive “Barista Guidance” system to help you dial in your machine.
It’s a lot more money, but it’s also a lot more espresso machine for that money. If cold coffee is important to you, or you want all the help for getting amazing espresso at home, then it is well worth the extra $500ish for the Barista Touch Impress.
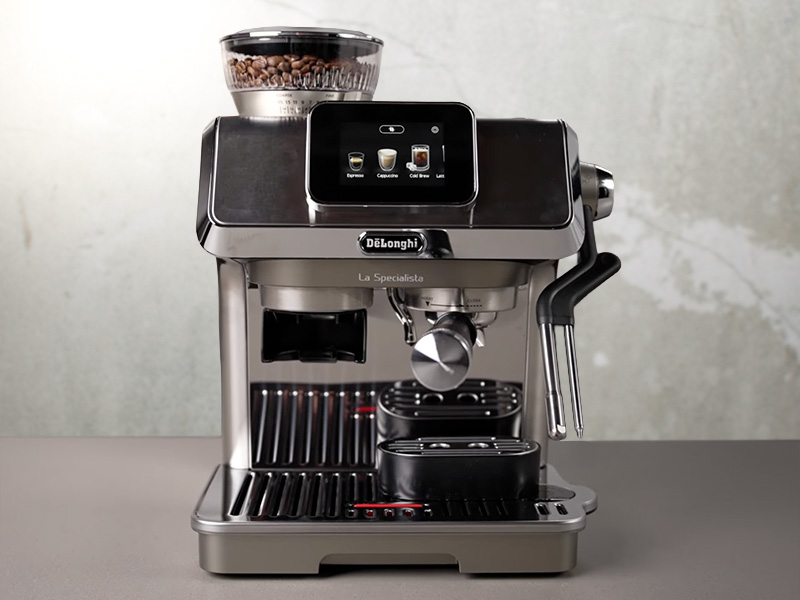
DeLonghi La Specialista Touch
- ☕️ Espresso Quality: 8.5/10
- 🥛 Milk Quality: 8/10
- 📋 Drinks Options: 8/10
- 💸 Value for Money: 7.5/10
- 🏆 Overall Rating: 8/10
The DeLonghi La Specialista Touch is a genuine alternative at nearly the same price. And it offers a couple of things the Barista Touch doesn’t:
- A dual boiler, so there’s no waiting between pulling a shot and steaming milk
- DeLonghi’s Bean Adapt technology, which helps you dial in new beans through guided prompts rather than trial and error
- Cold brew is a built-in function
The drawbacks are that the milk steaming isn’t as good as the Breville Barista Touch offers, the espresso quality isn’t as good, and the grinder isn’t as good (15 settings versus 30 on the Barista Touch).
So if espresso quality and grind control matter most to you, the Barista Touch wins. If you’d rather have more features and never want to wait between espresso and milk, the La Specialista Touch makes a compelling case.
![]() Read next: Our full DeLonghi La Specialista Touch review
Read next: Our full DeLonghi La Specialista Touch review
The Verdict
The Breville Barista Touch does half the job of making espresso at home simple.
The touchscreen makes the whole machine feel approachable. The auto-milk removes the skill barrier that trips most people up. And once you’ve found your grind setting and saved your drink preferences, the daily routine is straightforward, even when you’re half asleep.
You need to learn to tamp consistently, and you’ll need to buy some scales to get your shot times correct. Neither of these things is difficult, but you need to be willing to put in the work to start.
The rewards are worth it, though (in my opinion!) – superb espresso and cafe quality milk. While testing for this hands-on Breville Barista Touch review, we were consistently impressed. It’s certainly far better than any super-automatic machine we’ve tried at this price. For most people considering this machine, that little effort is absolutely fine.
Psst… the Barista Touch goes on sale more often than you’d expect, particularly in the US around the holidays. If you can find it below $850, it becomes one of the best-value espresso machines in this category.